I felt super lucky when we moved into our home in 2007 and found the original blue prints had been left for us, by every previous owner. Thanks owners! There are about 10 pages total and my original thought was to frame them up and hang them going up the stairway. Ummm, have you ever had to frame 10 things? It is not cheap. No no, not cheap at all. I needed a budget-friendly option. I also wanted to pick something that would preserve the prints. One day I may move from this house, and I want to leave the prints for the next lucky family and take the frames with me. Enter this DIY plexiglass option.
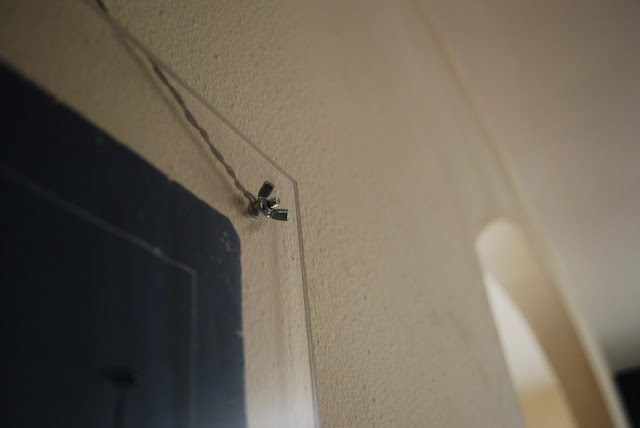
I ordered 4 total pieces of .118"thick plexi from Midland Plastics here in Madison. They were recommended to me, but I'm sure each medium-ish to large city has a plastics shop like this. I made sure to put 2 pieces of the plexi together before I drilled the 4 corners, so that the holes would line up perfectly. I can't remember which size drill bit/screws I used but I do remember that took some thought and planning. Also, take note of the border size. Normally I love framing with HUGE mats. The bigger the better, but that does not hold true for this method. A border that is too big just looks weird. Learn from my mistake. The border here is 1.5 inches which I think is perfect. That's enough room for the print to breathe between the screws.
Each corner was fixed with a screw and a wing nut. You could also use a regular nut, but I liked the industrial feel of the wing nuts, especially with the architectural prints, it made sense to me. I did use a few little glue dots to secure each print to the plexi so they don't slip down over time. Now, if you're really on a budget, you could just use one sheet of plexi and actually screw it into the wall, though that seemed a little destructive and a bit too permanent for me. The final step is picture wire. Do I need to explain that? I'm horrible at instructions. You just kindof twist it around. How's that?
2 down, 8 to go. I am on a roll. Hello Katie in a white button down perched against the wall so the camera doesn't shake. How to photograph these? I did/do not know. I really wish I was a better photographer. It's probably the skill I would most like to improve at some point.
Thank you Mr & Mrs L.N. Trachte of Lakewood Blvd. Your name I do not know how to pronounce but your thoughtfulness I do know how to appreciate.
Also, I have two other posts about inexpensive framing options here and here.


3 comments:
Really Amazing!!! Very Nice Blue Prints.
Interesting way to mount the plexi onto the wall using cable. I think it would look a lot nicer to cap the screws with bolts too. But very original idea with, blue prints!
Check out some of these samples with how they are mounted. http://art-hammer.blogspot.com/2013/03/decorate-your-store-with-wall-decor.html
You could have sandwiched the blue prints with plexi, though I think they look great as they are!
Post a Comment